

What are the installation precautions for Frosted U Shaped Glass?
Hey there! As a supplier of Frosted U Shaped Glass, I've seen my fair share of installation projects, and I know how crucial it is to get things right from the start. In this blog, I'll share some essential installation precautions for Frosted U Shaped Glass to ensure a successful and long - lasting installation.
1. Site Preparation
Before you even think about installing Frosted U Shaped Glass, you need to make sure the installation site is in top - notch condition. First off, the surface where the glass will be installed should be clean. Any dirt, dust, or debris can prevent a proper seal and lead to problems down the road. Use a good - quality cleaner to wipe down the area thoroughly.
The surface also needs to be level. Uneven surfaces can cause stress on the glass, which may result in cracking or breakage. You can use a spirit level to check the flatness of the surface. If it's not level, you'll need to make the necessary adjustments. For example, if there are small bumps, you can sand them down; for larger uneven areas, you might need to use a leveling compound.
2. Handling the Glass
Frosted U Shaped Glass is relatively fragile, so handling it with care is a must. When transporting the glass, make sure it's properly secured. Use strong, cushioned racks to prevent the glass from shifting and hitting against each other. Avoid any sudden movements or jolts that could cause damage.
When lifting the glass, use proper lifting equipment. You can't just grab it with your bare hands and expect it to be okay. Suction cups are a great tool for lifting glass safely. They distribute the weight evenly and reduce the risk of the glass slipping out of your hands. Also, wear protective gloves to prevent any cuts from sharp edges.
3. Measuring and Cutting
Accurate measurements are the key to a perfect installation. Measure the area where the glass will be installed multiple times to ensure precision. Even a small measurement error can lead to a glass that doesn't fit properly.
If you need to cut the Frosted U Shaped Glass, use the right tools. A glass cutter is the most common tool for this job. But remember, cutting glass is a skill that takes practice. Make sure you score the glass deeply enough along the cutting line. After scoring, use a breaking tool to snap the glass along the scored line.
It's important to note that cutting Frosted U Shaped Glass requires extra caution because the frosting can sometimes affect the cutting process. If you're not confident in your cutting skills, it might be a good idea to have a professional do it.
4. Sealing and Glazing
Sealing is a critical step in the installation of Frosted U Shaped Glass. A good seal will not only keep the glass in place but also prevent water, air, and dust from getting in. Choose a high - quality sealant that's suitable for glass. Silicone sealants are a popular choice because they're flexible and durable.
When applying the sealant, make sure the surface is dry and clean. Apply the sealant evenly around the edges of the glass. Use a caulking gun for a more precise application. After applying the sealant, smooth it out with a putty knife or a sealant finishing tool to create a neat and professional look.
Glazing is also important. Glazing beads or strips can be used to hold the glass in place and provide an additional layer of protection. Make sure the glazing materials are compatible with the glass and the sealant.
5. Safety Precautions
Safety should always be your number one priority when installing Frosted U Shaped Glass. Wear safety goggles to protect your eyes from any flying glass shards. As I mentioned earlier, gloves are essential to prevent cuts. You might also want to wear a hard hat if there's a risk of falling objects.
If you're working at height, use proper scaffolding or ladders. Make sure they're stable and secure before you start working. And always follow the safety guidelines provided by your local authorities.
6. Compatibility Check
Before you start the installation, check the compatibility of the Frosted U Shaped Glass with other building materials. For example, if you're using metal frames, make sure the glass won't react with the metal in a negative way. Some metals can cause corrosion or staining on the glass over time.

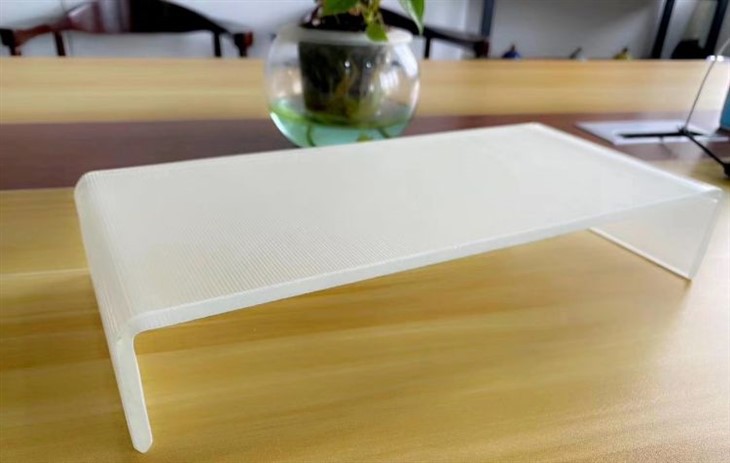
Also, consider the climate in the area where the glass will be installed. Frosted U Shaped Glass may have different performance characteristics in different climates. For example, in extremely cold areas, you might need to use a special type of sealant that can withstand low temperatures.
7. After - Installation Inspection
Once the installation is complete, don't just walk away and call it a day. Do a thorough inspection of the installed glass. Check for any visible cracks, chips, or gaps in the sealant. Make sure the glass is properly aligned and doesn't have any signs of stress.
Test the glass for leaks. You can do this by spraying water on the glass and checking if any water seeps through the seals. If you find any issues, address them immediately. This will help prevent more serious problems in the future.
Additional Information about Frosted U Shaped Glass Products
If you're interested in different types of frosted glass products, we also offer Frosted C Channel Glass, Sandblasted U Profile Glass, and Frosted Channel Glass. These products have their own unique features and can be used in a variety of applications.
In conclusion, installing Frosted U Shaped Glass requires careful planning, proper handling, and attention to detail. By following these installation precautions, you can ensure a successful installation that will enhance the beauty and functionality of your project.
If you're in the market for Frosted U Shaped Glass or any of our other glass products, I encourage you to reach out for a purchase negotiation. We're here to help you find the best glass solutions for your needs.
References
- Glass Association of North America. Glass Installation Manual.
- Local building codes and regulations.
- Manufacturer's installation guidelines for Frosted U Shaped Glass.